
Aniimo Holo-Battle Sim Guide – All 7 Training Styles, Gizmos and Event Differences (Plus the Easy Tuckin Vitality Combo)
4 difficulties for Grass, Water and Fire Training · 10-floor / 16-floor layout · Regular vs High-Difficulty Battle · Controllable vs Risk Events · Alpha Transformation · Repair Matrix Tuckin comboThe Holo-Battle Sim is a solo roguelike challenge made of Grass, Water and Fire Training × 4 difficulties. You choose a path on every floor and collect Holo-gizmos; once you hold 3 Gizmos of the same Training Style, you can unlock Alpha Transformation. The easy combo most players use right now is Vitality + Repair Matrix + Tuckin.
On your first Holo-Battle Sim run it is hard to tell whether to pick a Regular Battle or a High-Difficulty Battle, a Controllable Event or a Risk Event, and which Training Style is best among Energy, Surge, Defense, Vitality, Ironclad, Valor and Wealth. This guide sorts out the floor layout, the differences between node types, event options, each Training Style's Core Gizmo and Alpha Transformation, and the rewards. It also lays out the method and setup for the Vitality Tuckin combo that players say clears all three trainings easily.- Each of Grass, Water and Fire Training has 4 tiers: Easy, Normal, Hard and Challenge (recommended levels 50, 55, 60 and 63)
- Easy and Normal have 10 floors; Hard and Challenge have 16. An Alpha on floor 4 (and floor 9 on 16 floors) and an Omega on the last floor
- High-Difficulty Battle gives double Training Coins (250 → 500) and the enemy group appears twice. Enemy level is the same
- 3 Gizmos of the same Training Style → Alpha Transformation unlocks, and it is enhanced at 6, 9 and 12
- Easy combo: start with Vitality → get Repair Matrix after the first boss → swap in Mountain Form Tuckin
11. What kind of content is the Holo-Battle Sim?
- It is solo challenge content. There are 3 trainings, Grass Training, Water Training and Fire Training, each split into 4 difficulties: Easy, Normal, Hard and Challenge (the Normal difficulty is shown as "Common" in the training screen title). The recommended levels are 50 for Easy, 55 for Normal, 60 for Hard and 63 for Challenge.
- Once you clear every Basic Training, Advanced Training opens. On the Challenge difficulty the names change to Trial of Grass, Trial of Water and Trial of Fire.
- The training screen shows Recommended Attributes. Fire, Wind and Dark are strong for Grass Training; Grass, Lightning and Ice for Water Training; Water and Earth for Fire Training.
- The floor 4 Alpha is an "Offensive robot" of that attribute, and the final opponent depends on the difficulty. On Hard and Challenge the final boss is Grass Tuckin, Water Sherro and Fire Infergon.
Recommended attributes and final opponent for each training
| Training | Recommended Attributes | Final opponent on Easy / Normal (floor 10) | Hard / Challenge: floor 9 / floor 16 |
|---|---|---|---|
| Grass Training | Fire · Wind · Dark | Irisal Alpha | Irisal Alpha / Tuckin Omega |
| Water Training | Grass · Lightning · Ice | Panpanta Alpha | Panpanta Alpha / Sherro Omega |
| Fire Training | Water · Earth | Scorchhowl Alpha | Scorchhowl Alpha / Infergon Omega |
Grass Training
- Recommended Attributes
- Fire · Wind · Dark
- Final opponent on Easy / Normal (floor 10)
- Irisal Alpha
- Hard / Challenge: floor 9 / floor 16
- Irisal Alpha / Tuckin Omega
Water Training
- Recommended Attributes
- Grass · Lightning · Ice
- Final opponent on Easy / Normal (floor 10)
- Panpanta Alpha
- Hard / Challenge: floor 9 / floor 16
- Panpanta Alpha / Sherro Omega
Fire Training
- Recommended Attributes
- Water · Earth
- Final opponent on Easy / Normal (floor 10)
- Scorchhowl Alpha
- Hard / Challenge: floor 9 / floor 16
- Scorchhowl Alpha / Infergon Omega
Grass Training Guide
Enemies by floor, Irisal Alpha's Iris healing, Tuckin Omega's Hummin, recommended parties
Water Training Guide
Enemies by floor, Panpanta Alpha, Minespine, Sherro Omega, Lightning party
Fire Training Guide
Trial of Fire fixed damage, Scorchhowl Alpha, Magmarex, Infergon Omega, Water party
22. The 10-floor and 16-floor layout
- Easy and Normal have 10 floors, while Hard and Challenge have 16. After you clear a floor, you choose the node (battle, event and so on) to go to next.
- Alpha and Omega nodes appear on fixed floors. On the floors in between you choose battles and events to collect Gizmos and Training Coins.
- At a Rest & Recovery node you recover HP and can buy Gizmos at the shop. Prices are 500 Training Coins for a Basic Gizmo, 1,000 for an Advanced Gizmo and 2,000 for a Core Gizmo. The door leading to this node is labeled "Rest".
Fixed nodes by floor
| Difficulty | Alpha | Rest & Recovery | Omega |
|---|---|---|---|
| Easy · Normal (10 floors) | Floor 4 | Floors 5 · 9 | Floor 10 |
| Hard · Challenge (16 floors) | Floors 4 · 9 | Floors 5 · 10 · 15 | Floor 16 |
Easy · Normal (10 floors)
- Alpha
- Floor 4
- Rest & Recovery
- Floors 5 · 9
- Omega
- Floor 10
Hard · Challenge (16 floors)
- Alpha
- Floors 4 · 9
- Rest & Recovery
- Floors 5 · 10 · 15
- Omega
- Floor 16
33. Regular Battle vs High-Difficulty Battle, Controllable Event vs Risk Event
- A High-Difficulty Battle gives double the Training Coins of a Regular Battle (250 → 500), and the enemy group generally appears twice (once in a Regular Battle). Enemy level is the same. Alpha and Omega give 750 coins.
- On the Challenge difficulty, every enemy in both Regular and High-Difficulty Battles gets one special effect (one of Solid, Might, Physical Resistance, Magical Resistance, Bulwark, Self-Heal, Disrupt, Vitality, Self-Destruction, Sacrifice, Shield Bash, Scorch or Chill).
- Controllable Events are events you can pick without losing anything (Stable Enhancement, Windfall, Holo-gizmo Wholesale and so on), while Risk Events stake HP or coins, or leave it to chance (Unstable Enhancement, Price of Growing Stronger, Red Button, Rock Paper Scissors and so on).
- A Wealth Event is an event node where you gain Training Coins. It is not the same thing as the "Wealth" Training Style, even though the name is the same.
- While your build is weak, it is safe to get to the next boss through Regular Battles, Controllable Events and Rest & Recovery, then take High-Difficulty Battles and Risk Events for more coins and Gizmos once your key Gizmos are collected.
Differences by node type
| Node | Details | Training Coins |
|---|---|---|
| Regular Battle | Enemy group appears once | 250 |
| High-Difficulty Battle | Enemy group appears twice (same level) | 500 |
| Alpha · Omega | Strong enemy on a fixed floor | 750 |
| Controllable Event | Choices with no downside | Varies by event |
| Risk Event | Stake HP or coins, or leave it to chance | Varies by event |
| Wealth Event | Event that gives Training Coins | Varies by event |
| Rest & Recovery | HP recovery + Gizmo shop | - |
Regular Battle
- Details
- Enemy group appears once
- Training Coins
- 250
High-Difficulty Battle
- Details
- Enemy group appears twice (same level)
- Training Coins
- 500
Alpha · Omega
- Details
- Strong enemy on a fixed floor
- Training Coins
- 750
Controllable Event
- Details
- Choices with no downside
- Training Coins
- Varies by event
Risk Event
- Details
- Stake HP or coins, or leave it to chance
- Training Coins
- Varies by event
Wealth Event
- Details
- Event that gives Training Coins
- Training Coins
- Varies by event
Rest & Recovery
- Details
- HP recovery + Gizmo shop
- Training Coins
- -
44. Event options at a glance
- Price of Growing Stronger is based on your current HP. Choose "It's worth it!" (lose 80% of current HP, 3 Gizmos) when you have plenty of HP, and choose "Play It Safe" if a boss comes right next.
- With the Red Button, the more you press, the lower the success chance gets: 80% the first time, 50% the second and 10% the third, and if you fail you lose all the rewards you have stacked up. Press the Blue Button to take your current reward and end the event.
- In Rock Paper Scissors, every round you win gives 1 Gizmo, and a loss means one more High-Difficulty Training. You can stop whenever you want.
Common events
| Event | Options |
|---|---|
| Stable Enhancement | Pick one for free: Max HP +10% / Healing efficiency +10% / Core Gizmo damage +10% / Training Coin earnings +10% |
| Unstable Enhancement | 1 random enhancement for free / 2 random enhancements for 500 Training Coins |
| Price of Growing Stronger | 1 Gizmo / lose 50% of current HP for 2 Gizmos / lose 80% of current HP for 3 Gizmos |
| Red Button | Red Button: success 80% → 50% → 10%, lose all rewards on failure / Blue Button: take your current reward |
| Rock Paper Scissors | Win for 1 Gizmo, lose for 1 High-Difficulty Training (50% each round) |
| Custom Training | Choose from Normal / High-Difficulty / Extreme Training (the harder, the bigger the reward) |
| Windfall | Take 1,000 Training Coins right away / random 100–2,000 Training Coins |
| Holo-gizmo Blind Box | 250 coins: 1 Basic Gizmo / 750 coins: 2 Basic and Advanced Gizmos / 1,500 coins: 3 Gizmos of any kind |
Stable Enhancement
- Options
- Pick one for free: Max HP +10% / Healing efficiency +10% / Core Gizmo damage +10% / Training Coin earnings +10%
Unstable Enhancement
- Options
- 1 random enhancement for free / 2 random enhancements for 500 Training Coins
Price of Growing Stronger
- Options
- 1 Gizmo / lose 50% of current HP for 2 Gizmos / lose 80% of current HP for 3 Gizmos
Red Button
- Options
- Red Button: success 80% → 50% → 10%, lose all rewards on failure / Blue Button: take your current reward
Rock Paper Scissors
- Options
- Win for 1 Gizmo, lose for 1 High-Difficulty Training (50% each round)
Custom Training
- Options
- Choose from Normal / High-Difficulty / Extreme Training (the harder, the bigger the reward)
Windfall
- Options
- Take 1,000 Training Coins right away / random 100–2,000 Training Coins
Holo-gizmo Blind Box
- Options
- 250 coins: 1 Basic Gizmo / 750 coins: 2 Basic and Advanced Gizmos / 1,500 coins: 3 Gizmos of any kind
55. The 7 Training Styles and Alpha Transformation
- When you start a training, you choose a Training Style. Gizmos of the chosen style appear far more often in that run, and each style has its own Core Gizmo and Alpha Transformation (the Aniimo you transform into).
- If you choose Random, the style is picked at random and you start with 500 Training Coins. Wealth is locked at first.
- Collect 3 Gizmos of the same style to unlock that style's Alpha Transformation, and its Twine skill is enhanced once each at 6, 9 and 12.
- An Alpha Transformation's stats follow your party Aniimo's combat power. It is a good idea to raise the other Aniimo you bring to the Holo-Battle Sim to a reasonable level too.
Core Gizmo and Alpha Transformation for each Training Style
| Training Style | What it boosts | Core Gizmo | Alpha Transformation |
|---|---|---|---|
| Energy | Skill damage | Energizing Bracer | Irisal |
| Surge | Ultimate damage | Surge Engine | Blazen |
| Defense | Buffs while you have a Shield | Reflective Barrier | Tubster |
| Vitality | Buffs when you receive healing | Repair Matrix | Leafy |
| Ironclad | Defensive stats | Flamewreath Armor | Helgon |
| Valor | Damage increases with damage taken | Fervor Mask | Scorchhowl |
| Wealth | Attacks using Training Coins | Predictive Dice | Stellarys |
Energy
- What it boosts
- Skill damage
- Core Gizmo
- Energizing Bracer
- Alpha Transformation
- Irisal
Surge
- What it boosts
- Ultimate damage
- Core Gizmo
- Surge Engine
- Alpha Transformation
- Blazen
Defense
- What it boosts
- Buffs while you have a Shield
- Core Gizmo
- Reflective Barrier
- Alpha Transformation
- Tubster
Vitality
- What it boosts
- Buffs when you receive healing
- Core Gizmo
- Repair Matrix
- Alpha Transformation
- Leafy
Ironclad
- What it boosts
- Defensive stats
- Core Gizmo
- Flamewreath Armor
- Alpha Transformation
- Helgon
Valor
- What it boosts
- Damage increases with damage taken
- Core Gizmo
- Fervor Mask
- Alpha Transformation
- Scorchhowl
Wealth
- What it boosts
- Attacks using Training Coins
- Core Gizmo
- Predictive Dice
- Alpha Transformation
- Stellarys
66. Holo-gizmos
- There are 77 Gizmos in all. Each Training Style has 6 Basic Gizmos, 4 Advanced Gizmos and 1 Core Gizmo.
- If you get the same Core Gizmo again, it becomes stronger twice more: α → Final.
- Core Gizmo effects (stage 1): Energizing Bracer Skill damage +25%, an elemental burst every 6 skills · Surge Engine Ultimate damage +40% · Reflective Barrier a Shield of 10% max HP every 10 seconds, fires energy bullets while the Shield is up · Repair Matrix recovers 3% of max HP every 5 seconds, fires a bouncing pulse whenever you receive healing · Flamewreath Armor P.DEF and M.DEF +10%, damage over time to enemies within 3 m · Fervor Mask damage taken -6%, a large area blast every 50 hits taken · Predictive Dice Training Coin earnings +15%, floating coins attack for every 200 coins
- When choosing Gizmos, the basic approach is to settle on one style and collect 3, then 6. That is what unlocks and enhances the Alpha Transformation. Gizmos of other styles that help right away, such as defense or recovery, are fine to mix in.
77. The easy combo: Vitality + Repair Matrix + Tuckin
- Players say this is a way to clear Grass, Water and Fire Training all with ease. The key is the Vitality Core Gizmo, "Repair Matrix". It fires a pulse every time you receive healing, dealing fixed damage based on the healing amount and your max HP and bouncing between enemies.
- Add Tuckin's "Draw Nourishment" to that. Once it roots itself in the ground, it instantly restores 50% of Hummin's HP, and it and the Hummin around it keep recovering 2% per second. Because healing keeps coming in, Matrix pulses keep firing, so damage stacks up even if you barely attack.
- 1. Choose Vitality as your Training Style. If you do not see Vitality, pick Random, and restart if that still does not give you Vitality. You need Vitality for Repair Matrix to show up reliably.
- 2. Play through the first boss (the floor 4 Alpha) with your usual damage dealer. You normally get the Matrix after beating the first boss.
- 3. Put Tuckin in the last party slot beforehand. Once you have the Matrix, change your party at a Rest & Recovery node (F1 on PC) and put Tuckin in the damage dealer slot.
- 4. From then on, go to the middle of the enemies and repeat rooting yourself with "Draw Nourishment". Use it again once you come out of the ground. Tuckin's body becomes tougher while doing this.
- Note: you have to dodge the boss's moving beam attack yourself. It is the most dangerous attack for this combo.
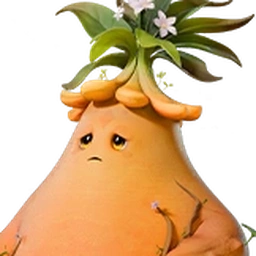 Mountain Form TuckinGrass · EarthNo Fire weakness, so it works in all three trainings
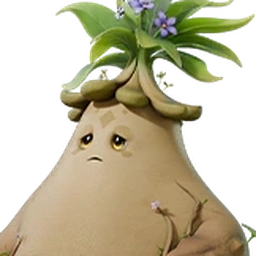 TuckinGrassThe Basic Form works too
Tuckin setup
- Mountain Form (Grass · Earth) is recommended. It has no Fire weakness, so you can use it in Grass, Water and Fire Training alike. It does not need to be Perfect or Alpha.
- Raise Potential mainly in HP and P.DEF / M.DEF. You do not need to raise BREAK.
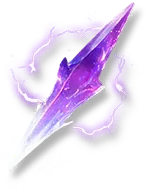
- A Lightning Needle is a good held item. It raises HP% and keeps dealing Lightning damage equal to 2% of its max HP to enemies within 3 m. If you do not have one, use a held item that raises HP.
Gizmos to pick first
- Repair Matrix (Vitality Core): if you get the same one again, it upgrades to α and Final, increasing the number of pulses and bounces.
- Matrix Enhancement (Vitality Basic): Matrix damage +6% for each Vitality Gizmo
- Bounce Amplifier (Vitality Advanced): Matrix bounces +2
- Vigor of Life (Vitality Basic): healing efficiency permanently +1% each time a pulse fires or bounces 50 times
- Beyond those, take just about every Vitality Gizmo and mix in defense and damage reduction Gizmos. At the shop, buy Vitality Gizmos first as well.
88. Vitality Tuckin party example
- Tuckin can do it alone, but adding an Aniimo that heals often makes the pulses fire more frequently. Below is the party one player used in Grass Training.
- Hexxin is your damage dealer and, with "Oozing Malice", applies 44% reduced healing received (20 seconds). It is good to put on enemies that heal, such as the Tuckin boss in Grass Training.
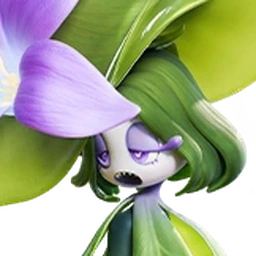
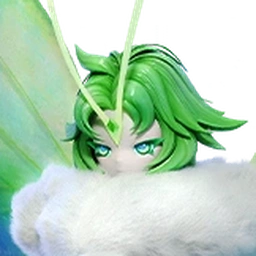
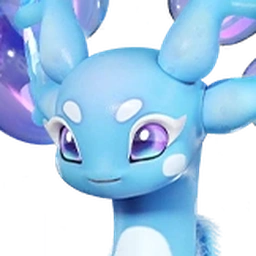
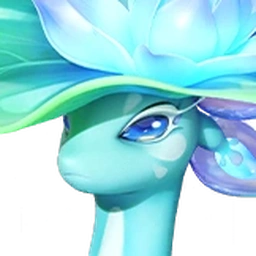
- Somniwing refills Primegy, while Glacy and Leafy keep the Matrix running with their healing skills. Tuckin's job is to stay rooted in the ground and hold out while the other Aniimo's skills are on cooldown.
- When the boss uses its pattern of scattering something around itself, stay right next to it and use skills to Break it quickly. When it is Broken, use Alpha Transformation and fire your Ultimate to finish it fast.
- You do not need to train heavily. Reportedly, raising Potential only up to the tier where the 4% bonus applies was enough.

99. Rewards: First Clear Reward, Training Incentive and Omega Trial
- You receive the First Clear Reward once per season for each difficulty.
- The Training Incentive (weekly reward, called "Training Incentive" in the rules text too) refreshes every Monday at 05:00 (Korea time). Claim it from the "Training Incentive" button at the bottom left of the training screen; "Time remaining" is shown above it.
- If you clear the highest difficulty, you also receive the rewards of every lower difficulty. You only need to clear Challenge (or the highest difficulty you can clear) each week.
- Omega Trial is a weekly reward where you defeat Alpha and Omega enemies to collect Trial Points. It resets every Monday and gives Training Points, Quick Training Pass, Aniipod Ultra Voucher and Glimmer.
- The current season lasts until October 28 ("Season time remaining" at the top right of the training screen), and the next season starts on October 29. When the season changes, the bosses and training content may change.
Rewards by difficulty (per training)
| Difficulty | First Clear Reward (once per season) | Training Incentive (weekly) |
|---|---|---|
| Easy | Glimmer 50 · Capaseed 3 and more | Sparkling Crystal 30 · Credits 100,000 · Windborn Stamps 60 |
| Normal | Glimmer 50 · Capaseed 3 · Flux Crystal 6 and more | Sparkling Crystal 30 · Credits 100,000 · Tumbler 1 |
| Hard | Glimmer 100 · Capaseed 3 · Mark of the Strong: Breezy Plains 1 and more | Starcryst Essence 1 · Star Sand 2 · Star Dust 3 |
| Challenge | Glimmer 100 · Starcryst Essence 1 · Mark of the Strong: Breezy Plains 2 and more | Starcryst Essence 1 · Star Sand 2 · Star Dust 3 |
Easy
- First Clear Reward (once per season)
- Glimmer 50 · Capaseed 3 and more
- Training Incentive (weekly)
- Sparkling Crystal 30 · Credits 100,000 · Windborn Stamps 60
Normal
- First Clear Reward (once per season)
- Glimmer 50 · Capaseed 3 · Flux Crystal 6 and more
- Training Incentive (weekly)
- Sparkling Crystal 30 · Credits 100,000 · Tumbler 1
Hard
- First Clear Reward (once per season)
- Glimmer 100 · Capaseed 3 · Mark of the Strong: Breezy Plains 1 and more
- Training Incentive (weekly)
- Starcryst Essence 1 · Star Sand 2 · Star Dust 3
Challenge
- First Clear Reward (once per season)
- Glimmer 100 · Starcryst Essence 1 · Mark of the Strong: Breezy Plains 2 and more
- Training Incentive (weekly)
- Starcryst Essence 1 · Star Sand 2 · Star Dust 3
FAQ
- Q. What is different about a High-Difficulty Battle in the Holo-Battle Sim?
- It gives double the Training Coins (250 → 500) of a Regular Battle, and the enemy group appears twice. Enemy level is the same. Choosing it once your build is ready lets you collect more coins.
- Q. How do I use Alpha Transformation?
- Collect 3 Holo-gizmos of the same Training Style to unlock that style's Alpha Transformation, and it is enhanced once each at 6, 9 and 12. Its stats follow your party Aniimo's combat power.
- Q. Is there an easy way to clear the Holo-Battle Sim?
- A widely used method is to start with the Vitality style, get the Core Gizmo Repair Matrix after the first boss, swap in Mountain Form Tuckin, and keep rooting yourself with "Draw Nourishment". Healing keeps coming in, so damage stacks up through Matrix pulses. You only need to dodge the boss's moving beam.
- Q. Do I have to clear each difficulty separately for the weekly reward?
- No. If you clear the highest difficulty, you also receive the Training Incentive rewards of every lower difficulty. The First Clear Reward is once per season for each difficulty.
- Q. Who is the final boss of Grass Training?
- On Hard and Challenge the final opponent is the Tuckin Omega; on Easy and Normal it is the Irisal Alpha. In Water Training it is Sherro (Panpanta Alpha on Easy and Normal), and in Fire Training it is Infergon (Scorchhowl Alpha on Easy and Normal).
Pro tips
- •The Vitality Tuckin combo has you play through the first boss with your usual party. Raise one damage dealer that can hold out until the first boss.
- •Price of Growing Stronger is based on current HP, so you lose less by choosing it right before a Rest & Recovery node.
- •Alpha Transformation stats follow your party's combat power, so do not leave the last party slot empty; put a trained Aniimo there.
- •If you are about to lose, use "Leave" before your team goes down. When you come back you replay that floor (a boss fight, for example) from its start, and you keep the Gizmos you already have. You can't change your party, but leveling up, training or swapping held items outside seems to carry over.