
Aniimo Grass Training Guide – How to Beat Tuckin Omega and Irisal Alpha, Plus Recommended Parties (Holo-Battle Sim)
Recommended attributes Fire, Wind, Dark · Enemies by floor · Giant robot · Irisal Alpha's Iris healing · Tuckin Omega's Hummins · Challenge affixes · Vitality Tuckin, Fire and Dark partiesAlmost every enemy in Grass Training is Grass-attribute, so Fire, Wind and Dark have the advantage. There are two places where people get stuck: for the Irisal Alpha, kill the Irises that heal it first, and for the Tuckin Omega, kill the Hummins first.
In the Aniimo Holo-Battle Sim, many players say Grass Training (Trial of Grass on Challenge difficulty) is hard because the Tuckin Omega and the Irisal Alpha heal themselves. This guide sorts out the enemies on each floor, the patterns of the Giant robot, the Irisal Alpha and the Tuckin Omega, the time limit, and the Challenge affixes, and it collects the Vitality Tuckin, Fire and Dark parties that players have actually cleared with. For the shared basics such as Training Styles, Gizmos and events, see the Holo-Battle Sim guide.- Recommended attributes: Fire · Wind · Dark (only the Floor 13 Geoclaw is Ice)
- Easy and Normal end with the Irisal Alpha; Hard and Challenge have the Irisal Alpha on Floor 9 and the Tuckin Omega on Floor 16
- Irisal Alpha: kill the 3 healing Irises first, and dodge the straight beam that shows a warning marker
- Tuckin Omega: kill the Hummins first; hidden Hummins are revealed by Fire-element attacks
- After 150 seconds in Alpha/Omega fights (120 seconds in other battles), enemy attack rises by 25% every 30 seconds
11. Grass Training at a glance
- There are 4 difficulties: Easy (50) · Normal (55) · Hard (60) · Challenge (63) (recommended levels in brackets). Challenge is the "Trial of Grass".
- Almost every enemy is Grass-attribute, so the game recommends Fire · Wind · Dark. Only Floor 13 of Hard and Challenge has an Ice-attribute Geoclaw; Fire is also strong against it, but Wind is weak to it.
- On Hard and Challenge, the Trial of Grass effect applies. Grass-element Aniimo recover 1% of max HP every 3 seconds, and non-Grass Aniimo recover 0.5%. It applies only to your side.
Alpha and Omega by difficulty
| Difficulty | Floor 4 Alpha | Floor 9 Alpha | Last-floor boss |
|---|---|---|---|
| Easy · Normal (10 floors) | Giant robot | - | Floor 10 Irisal Alpha |
| Hard · Challenge (16 floors) | Giant robot | Irisal Alpha | Floor 16 Tuckin Omega |
Easy · Normal (10 floors)
- Floor 4 Alpha
- Giant robot
- Floor 9 Alpha
- -
- Last-floor boss
- Floor 10 Irisal Alpha
Hard · Challenge (16 floors)
- Floor 4 Alpha
- Giant robot
- Floor 9 Alpha
- Irisal Alpha
- Last-floor boss
- Floor 16 Tuckin Omega
Holo-Battle Sim Guide
The 7 Training Styles, Gizmos, event options, rewards, and the easy Vitality Tuckin combo
22. Enemies by floor
- Easy and Normal use the same rooms, and so do Hard and Challenge. Enemy levels are 50 on Easy, 55 on Normal, 60 on Hard and 62 on Challenge (63 from Floor 9).
- If you pick a High-Difficulty Battle, one strong enemy joins the regular group (an Irisal on Floor 2, a Hexxin on Floor 3, a Pomawk on Floor 7).
- Enemies get tougher the higher you climb. Floor 16 enemies have more than 3 times the HP of Floor 1 enemies.
Grass Training enemies by floor
| Floor | Enemies |
|---|---|
| Floor 1 | 5 Offensive robots |
| Floor 2 | 8 Iris (High-Difficulty: + Irisal) |
| Floor 3 | 8 Hummin (High-Difficulty: + Hexxin) |
| Floor 4 Alpha | Giant robot |
| Floor 7 | 8 Pomegg (High-Difficulty: + Pomawk) |
| Floor 8 (High-Difficulty) | 7 Budsquire + Thornblade, or 2 Gracewing, or a robot room |
| Easy · Normal Floor 10 boss | Irisal Alpha |
| Hard · Challenge Floor 9 Alpha | Irisal Alpha |
| Hard · Challenge Floors 11-14 | Defensive, twin and charge-up robot rooms; a Geoclaw (Ice) in the Floor 13 High-Difficulty Battle |
| Hard · Challenge Floor 16 boss | Tuckin Omega |
Floor 1
- Enemies
- 5 Offensive robots
Floor 2
- Enemies
- 8 Iris (High-Difficulty: + Irisal)
Floor 3
- Enemies
- 8 Hummin (High-Difficulty: + Hexxin)
Floor 4 Alpha
- Enemies
- Giant robot
Floor 7
- Enemies
- 8 Pomegg (High-Difficulty: + Pomawk)
Floor 8 (High-Difficulty)
- Enemies
- 7 Budsquire + Thornblade, or 2 Gracewing, or a robot room
Easy · Normal Floor 10 boss
- Enemies
- Irisal Alpha
Hard · Challenge Floor 9 Alpha
- Enemies
- Irisal Alpha
Hard · Challenge Floors 11-14
- Enemies
- Defensive, twin and charge-up robot rooms; a Geoclaw (Ice) in the Floor 13 High-Difficulty Battle
Hard · Challenge Floor 16 boss
- Enemies
- Tuckin Omega
33. Floor 4 Alpha: the Giant robot
- It uses combo strikes, a jump followed by a smash, and a fan-shaped shockwave. When you see a big wind-up, step to the side.
- Small robots summoned by the Giant robot explode when defeated, and the explosion damages both enemies and your side. If you pop one next to the Giant robot, it takes damage too; if one blows up next to you, you get hit.
- If you use the Vitality Tuckin combo, you usually get the "Repair Matrix" after beating this Alpha. Until then, play with your usual damage dealer.
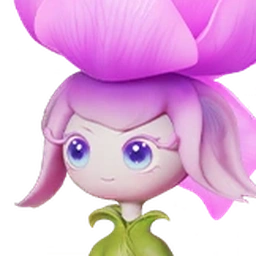
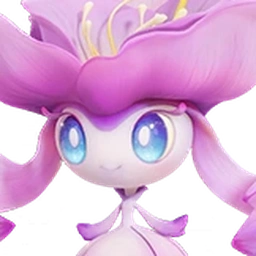
44. Irisal Alpha (Floor 10 on Easy · Normal, Floor 9 on Hard · Challenge)
- It summons 3 Irises to heal itself. The game even tells you: "Irises are healing the Alpha Irisal! Defeat the Irises as soon as possible!" When the Irises appear, kill them before the boss.
- It charges up a straight beam that shows a warning marker first and then fires it. This is the most dangerous attack for the Vitality Tuckin combo, so dodge it by hand when you see the marker. It also uses homing petals, a flower trap and a fountain attack.
- When the Irisal Alpha goes into a sleep-like state, it puts Weakened on itself (BREAK Damage taken +50% for 8 seconds). Pour your Break skills and damage into it then.
- Many guides say that when the boss scatters something around itself, it is actually safer and does more damage to stay right next to it and use your skills.
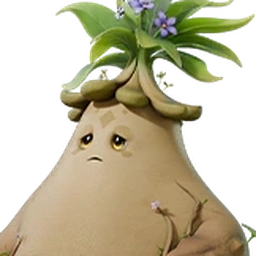
55. Tuckin Omega (Floor 16 on Hard · Challenge)
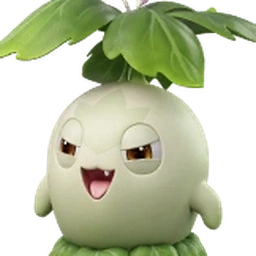
- When angry, it summons up to 3 Hummins. The game's notices include "The Hummins are down, and Tuckin took damage as well!" and "The Hummins transferred their HP to Tuckin!" If you leave Hummins alive, Tuckin heals; if you kill them, Tuckin takes damage, so deal with the Hummins first.
- Hummins can hide. A Fire-element skill or burning reveals them. This is why a Fire party is especially comfortable against this boss.
- If a Hummin's headbutt hits you, the Hummin attaches to your Aniimo. You need to deal with the attached Hummin too.
- With its two-handed punch it sends Hummins charging in a straight line, and a warning line appears on the floor first. Get out of the line. It also fires 6 projectiles and roars, and the roar interrupts the skill you are casting.
- If Tuckin heals so much that its HP will not go down, apply healing reduction. Hexxin's "Oozing Malice" reduces healing received by 44% for 20 seconds; with a 25-second cooldown, casting it again each time keeps it up almost permanently.
- When it is Broken, use Alpha Transformation and pour in your Ultimate. A lot of its HP drops at this timing.
66. Time limit and Challenge affixes
- Every floor has a time limit. After 120 seconds in Regular and High-Difficulty Battles, and 150 seconds in Alpha and Omega fights, a "Time is up" notice appears, the enemy immediately gains 1 stack of Enraged, and then 1 more stack every 30 seconds. Each stack gives +25% P.ATK and M.ATK. You do not fail on time, but the longer you drag it out, the faster the damage you take grows.
- On Challenge, every room puts one affix on the enemies. In Grass Training, watch out for the three that involve healing.
- Self-Heal: at 20% HP, it quickly recovers 30% HP over 5 seconds. Burst it down right before that, or keep healing reduction on it.
- Vitality (the affix, not the Training Style): when defeated, it creates a healing field. If the mobs are grouped, the remaining ones heal, so pull them out of the field before you kill them.
- Scorch: deals damage over time and also lowers your side's healing efficiency by 35%. It is especially bad for the Vitality Tuckin combo, which deals damage through healing, so finish a Scorch room quickly.
- Alpha and Omega rooms get one of Solid, Might, Physical Resistance, Magical Resistance, Bulwark, Self-Heal, Scorch or Chill. The Tuckin Omega or Irisal Alpha can end up with Self-Heal.
Challenge affixes (one per room)
| Affix | Effect |
|---|---|
| Solid | Damage taken reduced by 15% |
| Might | ATK increased by 30% |
| Physical Resistance · Magical Resistance | Physical / magical damage reduced by 20% |
| Bulwark | At 50% HP, gains a Shield worth 30% of max HP |
| Self-Heal | At 20% HP, recovers 30% HP over 5 seconds |
| Disrupt | Fires a slowing field when defeated |
| Vitality | Creates a healing field when defeated |
| Self-Destruction | Explodes when defeated |
| Sacrifice | The nearest enemy gains a Shield worth 15% HP and 15% ATK |
| Shield Bash | Gains a Shield worth 5% of max HP when dealing damage |
| Scorch | Damage over time + lowers your side's healing efficiency by 35% |
| Chill | Damage over time + 25% slow |
Solid
- Effect
- Damage taken reduced by 15%
Might
- Effect
- ATK increased by 30%
Physical Resistance · Magical Resistance
- Effect
- Physical / magical damage reduced by 20%
Bulwark
- Effect
- At 50% HP, gains a Shield worth 30% of max HP
Self-Heal
- Effect
- At 20% HP, recovers 30% HP over 5 seconds
Disrupt
- Effect
- Fires a slowing field when defeated
Vitality
- Effect
- Creates a healing field when defeated
Self-Destruction
- Effect
- Explodes when defeated
Sacrifice
- Effect
- The nearest enemy gains a Shield worth 15% HP and 15% ATK
Shield Bash
- Effect
- Gains a Shield worth 5% of max HP when dealing damage
Scorch
- Effect
- Damage over time + lowers your side's healing efficiency by 35%
Chill
- Effect
- Damage over time + 25% slow
77. Recommended parties
- These are parties that players have actually used to clear Grass Training. Pick the one that fits the Aniimo you own.
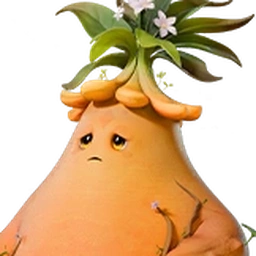 Mountain Form TuckinAVitality Matrix
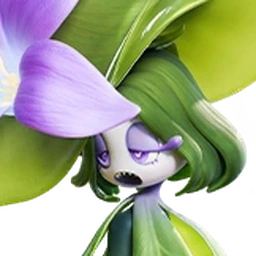 HexxinA · CHealing reduction
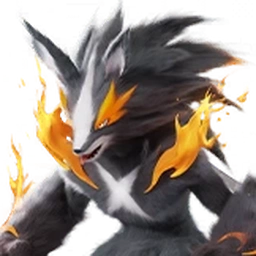 ScorchhowlBFire main damage dealer
 SparkelfBBoosts the Fire element
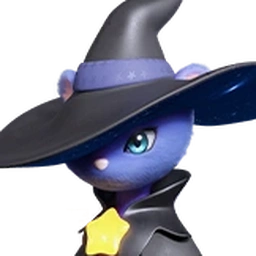 StellarysCDark main damage dealer
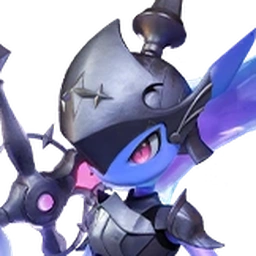 PawneyCFor the last boss
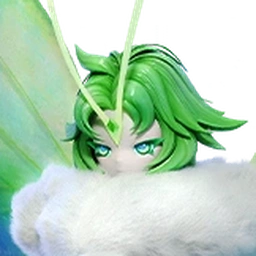 SomniwingA · BPrimegy
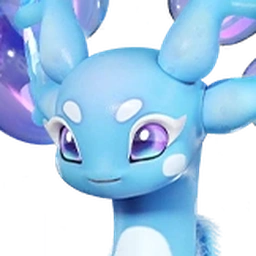 GlacyA · BHealing
A. Vitality Tuckin (the easiest)
- Start with the Vitality style and play with your usual damage dealer until the Floor 4 Alpha. Once you get the "Repair Matrix", switch to Mountain Form Tuckin at a Rest & Recovery node. Each time Tuckin burrows into the ground to recover with "Draw Nourishment", a Matrix pulse goes out and damage builds up.
- Bring along Hexxin (damage + healing reduction with "Oozing Malice"), Somniwing (Primegy), and Glacy · Leafy (healing). Held items: Lightning Needle for Tuckin, Heartseeker Pendant for Hexxin, Spirited Feather for Somniwing, and Miraculous Fleece for Glacy and Leafy.
- Against the Tuckin Omega, keep Oozing Malice up, and while the Hexxin and Glacy skill cooldowns are running, burrow in with Tuckin to hold on.
B. Fire party
- Scorchhowl (main damage dealer) + Somniwing (Primegy) + Sparkelf (boosts the Fire element with its Ultimate) + Glacy (healing)
- Fire-element attacks reveal hidden Hummins, which makes the Tuckin Omega easier. Fill up Primegy with Somniwing, then switch to Scorchhowl for one big hit.
- Even if the Risk Event "Price of Growing Stronger" costs you a lot of HP, Glacy's healing and your Ultimate can refill it right away in the next battle.
C. Dark party
- Players have cleared Challenge with Stellarys + Hexxin + Fragrancier + Dreaple. Stellarys is the main damage dealer, with Fragrancier and Dreaple supporting.
- Use Stellarys early on, and for the last boss you can also bring Pawney to Break it while cycling your Ultimate several times. A Surge Gizmo that strengthens the Ultimate fits well here.
88. If you lose to the boss
- If you use "Leave" during training and come back, you can replay that floor (a boss fight, for example) from its starting state. Even if you go down at the boss, you do not have to start over from Floor 1.
- If you are about to lose, you can press Leave quickly before your team goes down. The Gizmos you have collected up to then stay as they are.
- You can't change the party you picked at the start, but leveling up, training or swapping held items for those Aniimo outside seems to carry over when you re-enter. If you are stuck at the boss, leave, train a bit and try again.
- Before you go back in, review the patterns again. Just keeping to the order of killing the Irises and Hummins first and dodging the warning markers makes it much easier.
- At the Rest & Recovery node right before the boss, you can recover and buy Gizmos at the shop. If you have coins left, spend them before you go in.
FAQ
- Q. What are the recommended attributes for Grass Training?
- Fire · Wind · Dark. Almost every enemy is Grass-attribute, and only the Floor 13 Geoclaw on Hard and Challenge is Ice-attribute. Fire is also good for revealing Hummins.
- Q. The Tuckin Omega's HP keeps filling back up.
- Kill the Hummins first. While Hummins are alive they pass their HP to Tuckin, and when you kill them Tuckin takes damage. Hidden Hummins are revealed by Fire-element attacks. Healing reduction such as Hexxin's "Oozing Malice" also helps.
- Q. The Irisal Alpha keeps healing.
- It is the 3 Irises healing it. When the Irises appear, kill them all first. Dodge the straight beam that shows a warning marker, and pour in your damage while it is Weakened (BREAK Damage taken +50%) to take it down fast.
- Q. If I lose to the boss, do I have to start from the beginning?
- No. If you use "Leave" and come back, you can replay that floor from its starting state. Your Gizmos stay as they are. You can't change your party, but leveling up, training or swapping held items outside seems to carry over.
- Q. What happens when time runs out?
- After 120 seconds in Regular and High-Difficulty Battles, or 150 seconds in Alpha and Omega fights, the enemy's P.ATK and M.ATK go up by 25% right away, and by another 25% every 30 seconds after that. You do not fail, but it is best to finish quickly.
Pro tips
- •A room with Scorch on Challenge lowers healing efficiency by 35%, so with a Vitality party, finish that room quickly with your damage dealer.
- •If you pop the Giant robot's small robots next to the Giant robot, the explosion damages it as well.
- •Having at least one Fire-element Aniimo makes it easy to find the Tuckin Omega's hidden Hummins.