
NO. 41NEgg Heist, Bosses & BattlesUpdated: 2026.10.12
Aniimo Fire Training Guide – How to Beat Infergon Omega and Scorchhowl Alpha, Plus a Recommended Party (Holo-Battle Sim)
Recommended attributes Water · Earth · Trial of Fire fixed damage · Enemies by floor · Scorchhowl Alpha's flames · Floor 13 Magmarex Overheated state and Mutually Assured Destruction · Infergon Omega's flight and Fire Element Crystallites · Sherro, Piopiota and Panpanta Water partyFire Training is the hardest of the three trainings. Nearly every enemy is Fire, so Water · Earth have the edge, but on Hard and Challenge any Aniimo that is not Fire or Earth takes 1% of its max HP every 2 seconds, so even a Water party needs healing. For the final Infergon Omega, hold out while it is in the air, and burst it down once it lands.
This guide sorts out Fire Training of the Aniimo Holo-Battle Sim (the Challenge difficulty is the Trial of Fire). It covers the enemies on each floor, the patterns of Scorchhowl Alpha, Magmarex and Infergon Omega, the floor 13 Mutually Assured Destruction battle, the Trial of Fire fixed damage, the time limit and Challenge special effects, along with a Sherro, Piopiota and Panpanta Water party that players have actually cleared with. Shared content such as Training Styles, Gizmos and events is in the Holo-Battle Sim guide.- Recommended attributes: Water · Earth (floor 7 has no Fire enemies, only Earth and Water/Wind ones)
- Hard · Challenge [Trial of Fire]: Aniimo that are not Fire or Earth take fixed damage of 1% max HP every 2 seconds → even Water parties need healing, and the Vitality style is recommended
- Easy · Normal end with Scorchhowl Alpha; Hard · Challenge have Scorchhowl Alpha on floor 9, Magmarex on floor 13 and Infergon Omega on floor 16
- Infergon Omega: dodge when it flies and breathes fire, burst it down during Weakened (BREAK damage taken +50%) after its landing attack, and shatter the Fire Element Crystallites to make a safe zone
- Challenge enemies are tougher than in the other two trainings (floor 16 boss HP modifier +306%, versus +245% in Grass and Water)
11. Fire Training at a glance
- There are 4 difficulties: Easy (50) · Normal (55) · Hard (60) · Challenge (63) (recommended levels in parentheses). Challenge is the "Trial of Fire".
- Nearly every enemy is Fire, so the game recommends just two attributes, Water · Earth. Floor 7, however, has no Fire enemies. Budclaw, Shrubclaw and Pebbling are Earth, and Chirpi and Cornet are Water/Wind. Water attacks hit Earth well but do less against Water/Wind Chirpi, so a Water party has an easier time with the Budclaw room on floor 7.
- On Hard and Challenge the [Trial of Fire] effect applies. Aniimo that are not Fire or Earth take fixed damage of 1% of max HP every 2 seconds. That is 30% per minute. Water Aniimo, the recommended attribute, take it too, so bring a healer or the Vitality style.
- Challenge enemies are tougher than in Grass and Water. The gap starts from floor 6, and the floor 16 boss has an HP modifier of +306% (+245% in Grass and Water).
Alpha and Omega by difficulty
| Difficulty | Floor 4 Alpha | Floor 9 Alpha | Omega on the last floor |
|---|---|---|---|
| Easy · Normal (10 floors) | Giant robot | - | Floor 10 Scorchhowl Alpha |
| Hard · Challenge (16 floors) | Giant robot | Scorchhowl Alpha | Floor 16 Infergon Omega |
Easy · Normal (10 floors)
- Floor 4 Alpha
- Giant robot
- Floor 9 Alpha
- -
- Omega on the last floor
- Floor 10 Scorchhowl Alpha
Hard · Challenge (16 floors)
- Floor 4 Alpha
- Giant robot
- Floor 9 Alpha
- Scorchhowl Alpha
- Omega on the last floor
- Floor 16 Infergon Omega
🧪
Holo-Battle Sim Guide
The 7 Training Styles, Gizmos, event options, rewards, and the easy Vitality Tuckin combo
22. Enemies by floor
- Easy and Normal have the same rooms, and so do Hard and Challenge. Enemy levels are 50 on Easy, 55 on Normal, 60 on Hard and 62 on Challenge (63 from floor 9).
- If you pick a High-Difficulty Battle, one stronger enemy is added to the regular group (Flamerion on floor 2, Scorchhowl on floor 3, Shrubclaw or Cornet on floor 7, Magmarex on floor 8).
- All robots are Fire.
Fire Training enemies by floor
| Floor | Enemies |
|---|---|
| Floor 1 | 5 Offensive robots |
| Floor 2 | 8 Sparki (High-Difficulty: + Flamerion) |
| Floor 3 | 8 Emberpup (High-Difficulty: + Scorchhowl) |
| Floor 4 Alpha | Giant robot |
| Floor 7 | A group of Budclaw (Earth) or a group of Chirpi (Water/Wind) (High-Difficulty: + Shrubclaw or + Cornet) |
| Floor 8 (High-Difficulty) | 7 Pebbling (Earth) + Magmarex (Fire/Earth), or a robot room |
| Easy · Normal floor 10 boss | Scorchhowl Alpha |
| Hard · Challenge floor 9 Alpha | Scorchhowl Alpha |
| Hard · Challenge floors 11–14 | Defensive robot and twin robot rooms, the floor 13 Mutually Assured Destruction battle (60 seconds) or Magmarex (Fire/Earth) in the High-Difficulty Battle |
| Hard · Challenge floor 16 boss | Infergon Omega |
Floor 1
- Enemies
- 5 Offensive robots
Floor 2
- Enemies
- 8 Sparki (High-Difficulty: + Flamerion)
Floor 3
- Enemies
- 8 Emberpup (High-Difficulty: + Scorchhowl)
Floor 4 Alpha
- Enemies
- Giant robot
Floor 7
- Enemies
- A group of Budclaw (Earth) or a group of Chirpi (Water/Wind) (High-Difficulty: + Shrubclaw or + Cornet)
Floor 8 (High-Difficulty)
- Enemies
- 7 Pebbling (Earth) + Magmarex (Fire/Earth), or a robot room
Easy · Normal floor 10 boss
- Enemies
- Scorchhowl Alpha
Hard · Challenge floor 9 Alpha
- Enemies
- Scorchhowl Alpha
Hard · Challenge floors 11–14
- Enemies
- Defensive robot and twin robot rooms, the floor 13 Mutually Assured Destruction battle (60 seconds) or Magmarex (Fire/Earth) in the High-Difficulty Battle
Hard · Challenge floor 16 boss
- Enemies
- Infergon Omega
33. The floor 4 Alpha: Giant robot
- It is the same Giant robot as in Grass and Water Training (only its attribute is Fire). It uses combos, a jump followed by a slam, and a fan-shaped shockwave, so step aside when you see a big wind-up.
- Small robots summoned by the Giant robot explode when defeated, dealing damage to both enemies and your side. If you pop them next to the Giant robot, you can damage it with them.
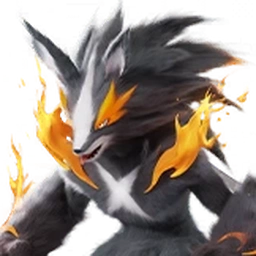
44. Scorchhowl Alpha (Easy · Normal floor 10, Hard · Challenge floor 9)
- The in-game notice says Scorchhowl Alpha leaves continuously burning flames in the areas it attacks. If you walk through the flames you get a Fire Elemental Debuff and take damage over time. Water element skills can quickly put out the fire, so with a Water party, put out the flames on the ground as you fight.
- It uses an aerial strike, a charging headbutt, a crescent slash followed by a backward jump, a charge punch, fireballs and a spinning attack. A warning marker shows on the ground first before the charge and the spin.
- It has a big move where it gathers flames, then jumps up and causes a huge explosion. If you see it absorbing flames, get far away.
- It does not summon minions, so if you avoid the ground flames and the big explosion you can focus on damage. Many players say this Alpha is quite tricky because it lays flames all around.
55. Floor 13: Mutually Assured Destruction and Magmarex (Hard · Challenge)
- Floor 13 can have a "Mutually Assured Destruction" room that only exists in Fire Training. A robot summons up to 6 self-destructing small robots, and you must defeat all of them within 60 seconds to get the Gizmo reward. If time runs out you move on to the next floor with no reward.
- As the in-game notice says, small robots explode when defeated and deal damage to both enemies and your side. If you pop them next to the robot that summons them, it ends quickly.
- The floor 13 High-Difficulty Battle (BOSS) has Magmarex (Fire/Earth). Water attacks are strong against both Fire and Earth, so this is especially good for a Water party.
- When Magmarex enters the Overheated state (30 seconds), its ATK and Movement Speed rise, and being hit by its regular attacks stacks Burn (10 seconds, up to 15 stacks). In return its DEF and Water resistance drop, so keep your distance so Burn does not stack and land Water skills.
- This room is not an Alpha room, so the time limit is 120 seconds.
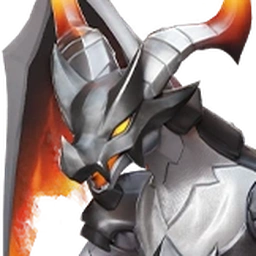
66. Infergon Omega (Hard · Challenge floor 16)
- The in-game notice says Infergon takes off and breathes fire so dodge it, and that using ranged Aniimo to knock Infergon down gives you plenty of time to deal damage. When it takes off, knock it down with ranged attacks, and dodge the long streams of fire (they leave long strips of fire on the ground) by moving to the side.
- After its landing attack, Infergon puts Weakened on itself (BREAK damage taken +50%, 8 seconds). Pour your BREAK skills and damage in at this moment.
- When "Infergon's Fire Element Crystallites are about to explode! Shatter them to create safe zones and avoid the shock wave!" appears, shatter the Fire Element Crystallites on the ground and move to that spot. This looks like the strongest attack among this boss's moves.
- It has Super Armor while stomping, so control skills do not work and it cannot be pushed back. Other than that it uses claw swipes, headbutts, tail swipes, consecutive fireballs, split bombs and a roar.
- Partway through, it enters what looks like a transformed, empowered state, which seems to end when it is BROKEN, bringing it back down to the ground.
- It does not summon minions, but its attacks are wide and powerful. Many players say it is the trickiest of the Holo-Battle Sim bosses, so do not push it; take it down slowly and safely.
77. Time limit and Challenge special effects
- Same as Grass and Water Training. After 120 seconds in Regular and High-Difficulty Battles, or 150 seconds against an Alpha or Omega, enemies gain Enraged (P.ATK and M.ATK +25%) and 1 more stack every 30 seconds. You do not fail because of the time limit.
- In Fire Training the [Trial of Fire] fixed damage stacks on top of that, so the longer the fight goes, the worse it gets on both fronts. If you are short on damage, pick Gizmos that add damage.
- On Challenge, each room gives its enemies one special effect. There are the same 13 types as in Grass Training. Alpha and Omega rooms get one of Solid, Might, Physical Resistance, Magical Resistance, Bulwark, Self-Heal, Scorch or Chill, and Mutually Assured Destruction, the floor 14 wave rooms and events get none.
- With Scorch, healing efficiency on your side drops by 35%. That hurts a lot in Fire Training, where you rely on healing to survive the fixed damage, so finish that room quickly.
88. Recommended party
- The parties below are combinations players have actually cleared Fire Training with. Because you have to survive the fixed damage, many players pick Vitality as the Core Gizmo.
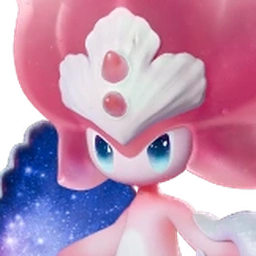 SherroAMain damage dealer
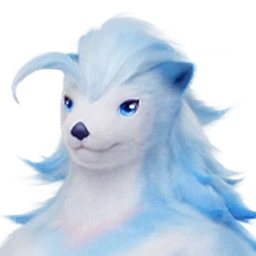 PiopiotaAPuddles · healing
 PanpantaABREAK
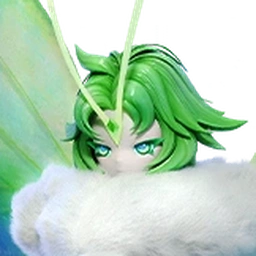 SomniwingAPrimegy
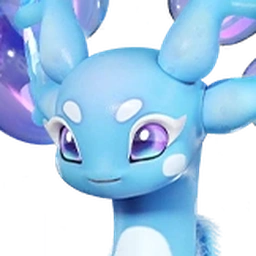 GlacyAHealing in place of Somniwing
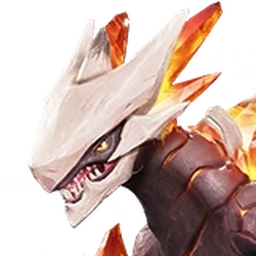 MagmarexBFire/Earth · no fixed damage
A. Water party (Sherro + Piopiota + Panpanta)
WaterVitality
- Sherro (main damage dealer) + Piopiota (support) + Panpanta (BREAK) + Somniwing (Primegy)
- Piopiota equips the Spirited Feather and lays down 4 puddles with "Surf". The more puddles "Surge" absorbs, the more it heals, but the puddles disappear, so use it only when you need to. With its trait "Radiant Charm", Water Elemental Boost of party members of the opposite sex rises by 16%.
- Panpanta equips the Gargantuan Horn, uses "Splash Shield" first, then wears down the BREAK gauge with "Hydro Roll" and its Ultimate. Its trait "Appeal" raises BREAK efficiency by 30% if there is an opposite-sex party member from the Susuta family (Piopiota), so match them up so that Piopiota and Panpanta are opposite sexes.
- Sherro equips the Ferocious Fang. With its trait "Tidal Heart", Water Elemental Boost rises by 25% while it is in a water environment, so fight near the puddles Piopiota has laid down. Many guides say that if you also set up a Pact Held Item, its skills no longer consume puddles, which makes things much easier.
- You can also swap Somniwing for Glacy (Miraculous Fleece) to keep healing going, or use Popota in place of Panpanta.
B. Mixing in Fire · Earth Aniimo
EarthFire
- The [Trial of Fire] fixed damage does not apply to Fire · Earth Aniimo. If you bring an Earth Aniimo such as Magmarex (Fire/Earth) or Minespine (Earth), you take no fixed damage while fighting with it.
- Earth attacks hit Fire enemies well, but do less against the Water/Wind Chirpi and Cornet on floor 7 and against Earth enemies. Fire attacks do less against Fire enemies, so a Fire Aniimo is better used for BREAK and holding out than for damage.
99. If you lost to the boss
- If you use "Leave" during a training and come back in, you can replay that floor (a boss fight, for example) from its start. You do not have to start over from floor 1.
- If it looks like you will lose, you can press Leave quickly before going down. The Gizmos you have gathered so far are kept.
- You cannot change the party you chose at the start, but leveling up, training or swapping held items for those Aniimo outside seems to carry over when you come back in. If you get stuck on Infergon Omega, leave, raise them a little and try again.
- At the Rest & Recovery node right before the boss you can recover and buy Gizmos at the shop. Your HP is being chipped away by the fixed damage, so make sure you recover at that node.
FAQ
- Q. What are the recommended attributes for Fire Training?
- Water · Earth. Nearly every enemy is Fire, and the floor 13 Magmarex is Fire/Earth, so Water hits especially well. Floor 7 has no Fire enemies, so with a Water party pick the Earth Budclaw room.
- Q. My HP keeps dropping even when I stand still.
- That is the [Trial of Fire] effect on Hard and Challenge. Aniimo that are not Fire or Earth take fixed damage of 1% of max HP every 2 seconds. Water Aniimo take it too, so bring a healer or the Vitality style, and keep fights short.
- Q. How do I beat Infergon Omega?
- Dodge while it flies and breathes fire, knock it down with ranged attacks, and pour BREAK and damage in during Weakened (BREAK damage taken +50%, 8 seconds) after its landing attack. When "the Fire Element Crystallites are about to explode" appears, shatter them to create a safe zone and move there.
- Q. If I lose to the boss, do I have to start over?
- No. If you use "Leave" and come back in, you can replay that floor from its start. The Gizmos you have gathered are kept, and although you can't change your party, leveling up, training or swapping held items outside seems to carry over.
- Q. What is the floor 13 Mutually Assured Destruction battle?
- It is a room where you fight a robot that summons self-destructing small robots. If you defeat them all within 60 seconds you get the Gizmo reward, and if not you move on without a reward. The small robots' explosions also damage enemies, so pop them next to the robot that summons them.
Pro tips
- •If you fight near Piopiota's puddles, Sherro's "Tidal Heart" raises Water Elemental Boost by 25%.
- •Flames left on the ground by Scorchhowl Alpha can be put out with Water element skills.
- •When Infergon Omega uses its landing attack, Weakened is applied for 8 seconds. Save your BREAK skills for that moment.