
NO. 40NEgg Heist, Bosses & BattlesUpdated: 2026.10.12
Aniimo Water Training Guide – How to Beat Sherro Omega and Panpanta Alpha, Plus Recommended Parties (Holo-Battle Sim)
Recommended types Grass · Lightning · Ice · Enemies by floor · Panpanta Alpha's earth walls and rolling charge · Minespine (Earth) · Sherro Omega's greatsword · Trial of Water shield · Blazen and Fulmintis Lightning partyAlmost every enemy in Water Training is Water type, so Grass, Lightning and Ice have the edge, and it is the easiest of the three trainings. Watch out for the Earth-type Minespine (floors 7 and 13) and the last boss, Sherro Omega's greatsword attacks.
A rundown of Water Training in the Holo-Battle Sim (the Challenge difficulty is called Trial of Water). It covers the enemies on each floor, the patterns of Panpanta Alpha, Minespine and Sherro Omega, the Glacy event on floor 8, the Trial of Water shield effect, the time limit and the Challenge special effects, along with Blazen and Fulmintis Lightning parties that players have actually cleared with. The shared content such as Training Styles, Gizmos and events is in the Holo-Battle Sim guide.- Recommended types: Grass · Lightning · Ice (the Pebbling and Minespine on floors 7 and 13 are Earth type, so Grass is good against them and Lightning and Ice are at a disadvantage)
- Easy and Normal end with Panpanta Alpha; Hard and Challenge have Panpanta Alpha on floor 9 and Sherro Omega on floor 16
- Panpanta Alpha: puts up earth walls around you and charges while rolling; it does not summon
- Sherro Omega: dodge the giant water sword attacks by watching the warning markers; turning on its shield reduces damage taken by 20%
- On Hard and Challenge, the [Trial of Water] effect gives a Shield every 20 seconds (8% of max HP for Water-element Aniimo, 4% for the rest)
11. Water Training at a glance
- There are 4 difficulties: Easy (50) · Normal (55) · Hard (60) · Challenge (63) (recommended levels in brackets). Challenge is the "Trial of Water".
- Almost every enemy is Water type, so the game recommends Grass · Lightning · Ice. However, the Pebbling and Minespine on floor 7 and the Minespine on floor 13 of Hard and Challenge are Earth type. Grass is strong against Earth and Lightning and Ice are at a disadvantage, so even in a Lightning party it helps to bring one Grass Aniimo.
- Hard and Challenge add the [Trial of Water] effect. You get a Shield every 20 seconds: 8% of max HP for Water-element Aniimo and 4% for non-Water Aniimo. The Shield lasts 10 seconds and only applies to your side.
Alpha and Omega by difficulty
| Difficulty | Floor 4 Alpha | Floor 9 Alpha | Last-floor Omega |
|---|---|---|---|
| Easy · Normal (10 floors) | Giant robot | - | Floor 10 Panpanta Alpha |
| Hard · Challenge (16 floors) | Giant robot | Panpanta Alpha | Floor 16 Sherro Omega |
Easy · Normal (10 floors)
- Floor 4 Alpha
- Giant robot
- Floor 9 Alpha
- -
- Last-floor Omega
- Floor 10 Panpanta Alpha
Hard · Challenge (16 floors)
- Floor 4 Alpha
- Giant robot
- Floor 9 Alpha
- Panpanta Alpha
- Last-floor Omega
- Floor 16 Sherro Omega
🧪
Holo-Battle Sim Guide
The 7 Training Styles, Gizmos, event options, rewards, and the easy Vitality Tuckin combo
22. Enemies by floor
- Easy and Normal use the same rooms, and Hard and Challenge use the same rooms. Enemy levels are 50 on Easy, 55 on Normal, 60 on Hard and 62 on Challenge (63 from floor 9).
- If you pick a High-Difficulty Battle, one strong enemy joins the regular group (Glacy on floor 2, Piopiota on floor 3, Minespine or Cornet on floor 7, Sherro on floor 8).
- Enemies get tougher as you climb. How much stronger they get per floor is the same as in Grass Training.
Water Training enemies by floor
| Floor | Enemies |
|---|---|
| Floor 1 | 5 Offensive robots |
| Floor 2 | A group of Skippy (High-Difficulty: + Glacy) |
| Floor 3 | 8 Susuta (High-Difficulty: + Piopiota) |
| Floor 4 Alpha | Giant robot |
| Floor 7 | 8 Pebbling (Earth) or a group of Chirpi (High-Difficulty: + Minespine (Earth) or + Cornet) |
| Floor 8 | 7 Shelly + Sherro, or the 2-Glacy event, or a robot room |
| Easy · Normal floor 10 Omega | Panpanta Alpha |
| Hard · Challenge floor 9 Alpha | Panpanta Alpha |
| Hard · Challenge floors 11–14 | Defensive and twin robot rooms, Giant robots, and a Minespine (Earth) in the floor 13 High-Difficulty Battle |
| Hard · Challenge floor 16 Omega | Sherro Omega |
Floor 1
- Enemies
- 5 Offensive robots
Floor 2
- Enemies
- A group of Skippy (High-Difficulty: + Glacy)
Floor 3
- Enemies
- 8 Susuta (High-Difficulty: + Piopiota)
Floor 4 Alpha
- Enemies
- Giant robot
Floor 7
- Enemies
- 8 Pebbling (Earth) or a group of Chirpi (High-Difficulty: + Minespine (Earth) or + Cornet)
Floor 8
- Enemies
- 7 Shelly + Sherro, or the 2-Glacy event, or a robot room
Easy · Normal floor 10 Omega
- Enemies
- Panpanta Alpha
Hard · Challenge floor 9 Alpha
- Enemies
- Panpanta Alpha
Hard · Challenge floors 11–14
- Enemies
- Defensive and twin robot rooms, Giant robots, and a Minespine (Earth) in the floor 13 High-Difficulty Battle
Hard · Challenge floor 16 Omega
- Enemies
- Sherro Omega
33. The floor 4 Alpha, the Giant robot
- It is the same Giant robot as in Grass Training (only its type is Water). It uses a combo of punches, a jump followed by a slam, and a fan-shaped shockwave, so step to the side whenever you see a big wind-up.
- The small robots the Giant robot summons explode when defeated and damage both enemies and your own side. If you pop them next to the Giant robot, the blast hurts it too.
44. Panpanta Alpha (Easy · Normal floor 10, Hard · Challenge floor 9)
- It is a boss that does not summon minions, so just dodge its patterns and focus on dealing damage.
- It puts up an earth wall, and after a big move it sets 16 earth walls in a ring around you to fence in the arena. You end up fighting inside the walls, so do not stay pressed against them.
- It curls up and charges while rolling. Getting hit can stun you, so step aside from the direction it is rolling in.
- The water-pressure cannon it fires after charging shows a warning marker first. If you are hit by its slam, you can be stunned for 3 seconds.

55. The floor 8 event with 2 Glacy
- Among the floor 8 Risk Events is a room where you fight 2 enemy Glacy. Both heal and put a Shield on themselves with Healing Water.
- Focus on one at a time and take it down quickly. If you alternate between the two, the healing makes the fight drag on.
- If you win, there is a 50% chance you receive the Defense Core Gizmo Reflective Barrier.
- There is also a floor 8 High-Difficulty Battle with 7 Shelly + Sherro. It lets you preview Sherro's attacks before the final boss.
66. Floor 13 Minespine (Hard · Challenge, Earth type)
- The floor 13 High-Difficulty Battle (BOSS) has an Earth-type Minespine. Lightning and Ice attacks do less damage, so it is best to face it with a Grass Aniimo.
- When "The Alpha Minespine is causing strong seismic waves. Focus on dodging now!" appears, it sends out a shockwave every second for 8 seconds. Dodge first and attack later.
- Ranged attacks do not land while it is in Tunnel. Rock spikes burst up where it charges out from underground, so move away when it burrows.
- Stone Ball Drift, where it rolls a stone ball, deals 8% more damage with every hit, so get out of the way to avoid being hit repeatedly.
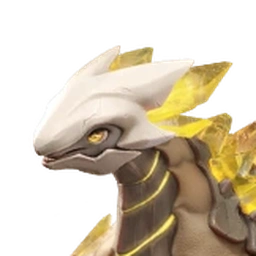
77. Sherro Omega (Hard · Challenge floor 16)
- The in-game hint says, "During battle, Sherro will periodically gather Water to form a giant sword and unleash a wide-range water wave attack." In giant water sword mode, a warning marker appears on the ground first, so move out of the area. The mode seems to end when you Break it.
- Its normal attacks give it Torrent Blade, which widens its attack range for 6 seconds. At close range, its combo reaches farther than you would expect.
- When it turns on its flowing water shield, damage taken drops by 20% for 15 seconds. Hold back your Ultimate during this time, and unload it after the shield fades or when it is Broken.
- It also uses Water Pillar, a long stream of water (fired while teleporting), a roll, and a flowing water sword (with a warning marker). The boss does not summon minions.
- Once it is Broken, use Alpha Transformation and pour everything in, Ultimate included.
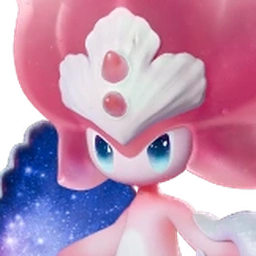
88. Time limit and Challenge special effects
- Same as Grass Training. After 120 seconds in Regular and High-Difficulty Battles, and 150 seconds against Alphas and Omegas, enemies become Enraged (+25% Physical and Magical ATK) and gain 1 more stack every 30 seconds. You do not fail for running out of time.
- In Challenge, every room gives the enemies one special effect. There are the same 13 types as in Grass Training, and Alpha and Omega rooms get one of Solid, Might, Physical Resistance, Magical Resistance, Bulwark, Self-Heal, Scorch or Chill.
- In Water Training, the floor 14 wave rooms and the floor 8 Glacy event get no special effect.
- Thanks to the [Trial of Water] Shield, it is easier to survive than in the Grass or Fire trainings. The Shield appears every 20 seconds and lasts 10 seconds, so push in boldly while you have it and deal your damage.
99. Recommended parties
- The parties below are ones players have actually cleared Water Training with. Many say Water Training is easy enough that any Core Gizmo will do.
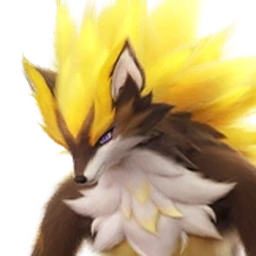 BlazenABreak
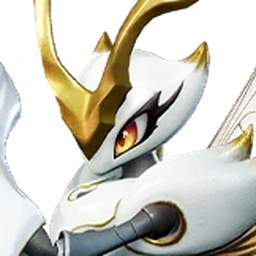 FulmintisAMain damage dealer
 FenmaneAIn place of Fulmintis
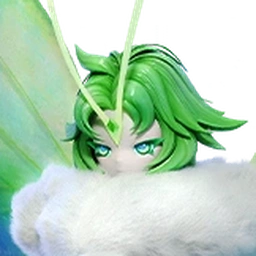 SomniwingAEnergy
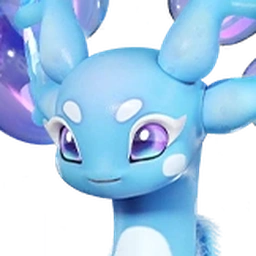 GlacyAHealing
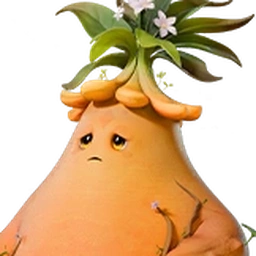 Mountain Form TuckinBVitality Matrix
A. Lightning party (most popular)
Lightning
- Blazen (Break) + Fulmintis (main damage dealer) + Somniwing (energy) + Glacy (healing)
- Blazen holds the held item Gargantuan Horn and chips away at the boss's Break gauge with its Ultimate, Lightning Cross and Electrified Impact.
- Fulmintis holds Ferocious Fang or a Heartseeker Pendant, and once the boss is Broken it follows up with Enhanced Lightning Blade and then Lightning Blade Storm or its Ultimate. If you do not have Fulmintis, Fenmane can be your damage dealer instead.
- If you have resources to spare, Luminelle and Besauce work in place of Somniwing and Glacy, but Somniwing and Glacy are enough.
- Lightning does less damage to the Earth-type enemies on floors 7 and 13, so finish those rooms quickly or face them with a Grass Aniimo.
B. Vitality Tuckin
VitalityGrass
- The shared guide's Vitality + Repair Matrix + Mountain Form Tuckin combo also works in Water Training. Tuckin is Grass type, so it has the advantage over Water enemies, and it is also good against the Earth-type Minespine.
- See the shared guide for the detailed setup.
1010. If you lose to the boss
- If you use "Leave" during training and come back in, you can replay that floor from its start (a boss fight, for example). You do not have to start over from floor 1.
- If it looks like you are going to lose, you can also press Leave quickly before you go down. The Gizmos you have collected so far are kept.
- You cannot change the party you first picked, but leveling up, training or swapping held items on those Aniimo outside and then coming back in seems to carry over.
- At the Rest & Recovery node right before the boss, you can heal and also buy Gizmos at the shop. If you have Training Coins left, spend them before you go in.
FAQ
- Q. What are the recommended types for Water Training?
- Grass · Lightning · Ice. Almost every enemy is Water type. However, the floor 7 Pebbling and Minespine and the floor 13 Minespine on Hard and Challenge are Earth type, so Lightning and Ice do less damage and Grass is better.
- Q. How do I beat Sherro Omega?
- While it builds its giant water sword, watch the warning marker on the ground and step out of the area. Hold back your Ultimate while the flowing water shield (20% less damage taken, 15 seconds) is up, and when it is Broken, use Alpha Transformation and pour in your Ultimate.
- Q. What does the [Trial of Water] effect do?
- Your side gets a Shield every 20 seconds. It is 8% of max HP for Water-element Aniimo and 4% for the others, and the Shield lasts 10 seconds.
- Q. If I lose to the boss, do I have to start over?
- No. If you use "Leave" and come back in, you can replay that floor from its start. The Gizmos you collected are kept, and although you cannot change your party, leveling up, training or swapping held items on your Aniimo outside seems to carry over.
- Q. I do not have Fulmintis.
- You can switch the damage dealer to Fenmane. Water Training is the easiest of the three, so just putting together Blazen (Break) + Somniwing + Glacy is enough to clear it.
Pro tips
- •In the floor 8 event with 2 Glacy, focus on one at a time. Both use healing and Shields.
- •While the floor 13 Minespine is burrowed underground, ranged attacks do not land, so wait and hit it when it comes out.
- •Hold back your Ultimate for the 15 seconds that Sherro Omega's flowing water shield is up.