
Aniimo Lita Lv. 65 Guide – Recommended Teams, Builds and How to Beat Each of Her Aniimo
Elite Pathfinder Rematch · Lita's 4 Prismana Aniimo (Lv. 65) · 7 recommended teams · How to handle each opponent · First-clear reward Prismana Sherro- Opponents: Lita's Prismana Stellarys · Prismana Glynsera · Prismana Sherro · Prismana Glacy — all Lv. 65
- When it opens: beat Lita once in the quest "Assessment: Starlight's Witness", then finish the quest and the rematch opens
- Time limit 5 minutes, victory condition "Defeat all of your opponent’s Aniimo"
- First-clear rewards: Glory Badge, Phenomena Crystal, Irisalis Petal and more. After that, talk to Lita in "Assessment: Starlight's Glory" to receive Sherro - Prismana
FLOWHow to fight the Lita rematch
4 stepsAssign opponents
Decide which opponent each of your 4 Aniimo will handle
Switch with her
When Lita switches Aniimo, switch to the one assigned to that opponent
Make an opening
Unload big attacks after Somniwing's Sleep or a BREAK
Pull out of the healing zone
Lure opponents out of the healing zone Glacy creates
Three-line summary
Key pointsRecommended stats (based on experience)
Based on experienceThis is not an entry requirement but the difficulty felt in cleared runs. It is a timed battle, so you need ATK and BREAK builds that take down your assigned opponent fast rather than builds that only hold out.
1What kind of battle is the Lita rematch?
- It is the "Elite Pathfinder Rematch" held at Boomblast Arena. The first Lita battle takes place in the quest "Assessment: Starlight's Witness", and finishing that quest opens the rematch.
- Lita's 4 Aniimo are all in Prismana Form at Lv. 65. The time limit is 5 minutes, and the victory condition is "Defeat all of your opponent’s Aniimo" (take down all 4 of Lita's Aniimo).
- On the party check screen before the battle you can see Lita's 4 Aniimo and the first-clear rewards. Change your party with "Party", then press "Duel Start" to begin the battle.
- Lita keeps switching to whichever Aniimo has the edge over the one you bring out, and her Glacy heals back the HP you have taken off. So it is closer to a battle where you decide who handles whom and switch every time Lita switches.
Lita's Aniimo and the Aniimo usually assigned to them in cleared runs
| Lita's Aniimo (Lv. 65) | Element | Usually assigned |
|---|---|---|
| Prismana Stellarys | Ice · Dark | Put it to sleep with Somniwing, then Scorchhowl, Lunara or Helion, or Prismana Infergon |
| Prismana Glynsera | Ice · Light | Stellarys (Fission Needles) |
| Prismana Sherro | Water · Light | Fulmintis |
| Prismana Glacy | Water · Light | Fulmintis |
 Prismana Stellarys
 Prismana Glynsera
 Prismana Sherro
 Prismana Glacy
Prismana Stellarys
- Element
- Ice · Dark
- Usually assigned
- Put it to sleep with Somniwing, then Scorchhowl, Lunara or Helion, or Prismana Infergon
Prismana Glynsera
- Element
- Ice · Light
- Usually assigned
- Stellarys (Fission Needles)
Prismana Sherro
- Element
- Water · Light
- Usually assigned
- Fulmintis
Prismana Glacy
- Element
- Water · Light
- Usually assigned
- Fulmintis
2The 4 things that matter most in the actual fight
- When the opponent changes, switch to its assigned Aniimo right away. Keeping a favorable matchup at all times is the basics.
- Don't just run around trying to dodge every unfavorable attack. You have to trade blows with your assigned opponent to some extent to finish in time.
- Lock down dangerous damage dealers like Stellarys and Sherro with a BREAK or Sleep, and take them down one at a time.
- When Glacy creates a healing zone, always lure the opponent out of the zone.
37 recommended teams
Pick a team and its assignment table, Potentials, Held Items and how to play it open right below. Cases where a different Aniimo fills the same slot are split out separately. Tap an Aniimo picture to go to its Index entry.
Why Potentials are set to 12, 16 and 20
Every time the Potential total (Innate + Acquired + the blue +number from Held Items and the like) reaches a multiple of 4, that stat rises by another +4%. That is why most of the numbers recommended in this guide are 12, 16 and 20. If a Held Item adds +2, the total lands on a multiple of 4 when the number on screen is 10, 14 or 18. For Aniimo at level 60 or below, you can set Potentials for Lita and reset them afterwards to redistribute (all materials are refunded; each reset costs 200,000 Credits). From level 61 you can no longer reset, so be careful with Aniimo at level 61 or above.
Pick a team to open its setup and play plan right below.
Selected team: A. Prismana Stellarys + Scorchhowl + Fulmintis + Somniwing
Selected team
A. Prismana Stellarys + Scorchhowl + Fulmintis + Somniwing
Three damage dealers split the opponents, and Somniwing handles Sleep and EP recovery.
Members



Who takes whom
- Prismana StellarysTakes on:Lita's Glynsera
- ScorchhowlTakes on:Lita's StellarysOne big hit after Somniwing puts it to sleep
- FulmintisTakes on:Lita's SherroLita's Glacy
- SomniwingSleep, EP recovery, taking hits while you switch
Potential and held items
- ATK 20
- HP 12 or more, and DEF (P.DEF · M.DEF) around 12 too
- The rest into staying power
- If fighting Glynsera is hard, raise HP further
- Basic attacks make up a large share of its damage, so there is little need to put much into REGEN
- For the Held Item, Fission Needles is almost always used
Held items

- ATK 20, BREAK 12
- HP · DEF around 12, the rest is up to you
- Against Lita it often has to handle the BREAK on its own, so BREAK 12 works well in the actual fight
Held items

- ATK 20, BREAK 20
- The rest into REGEN
- Its role is to deal big damage together with Somniwing's Sleep, so focus on ATK and BREAK rather than staying power
- For the Held Item, a spare Ferocious Fang
Held items

How to play
- Every time Lita switches Aniimo, switch right away to the Aniimo assigned to that opponent.
- When Lita's Stellarys comes out, put it to sleep with Somniwing, then switch to Scorchhowl and deal big damage.
- Fight Lita's Glynsera with Prismana Stellarys.
- Fulmintis takes care of Lita's Sherro and Glacy.
- When a damage dealer is short on EP or you need to take a dangerous attack for a moment, bring out Somniwing to refill EP, then switch back to the assigned damage dealer.
Other teams (tap to open)
B. Prismana Stellarys + Scorchhowl + Prismana Glynsera + Somniwing
This team uses Prismana Glynsera instead of Fulmintis from Team A. Pick it when you have not trained Fulmintis enough or your Prismana Glynsera is trained much better. Prismana Glynsera does not fight the same way as Fulmintis, so it is split out separately.
Members
Who takes whom
- Prismana StellarysTakes on:Lita's Glynsera
- ScorchhowlTakes on:Lita's Stellarys
- Prismana GlynseraTakes on:Lita's SherroLita's GlacyThe remaining opponents and BREAK
- SomniwingSleep, EP recovery, taking hits between switches
Potential and held items
- ATK-focused
- Investing in BREAK too is recommended
- Rather than looking only at ATK, keep in mind that against Lita it often has to wear down the opponent's BREAK gauge on its own
Held items
- The builds for Prismana Stellarys, Scorchhowl and Somniwing are the same as in Team A.
C. Prismana Stellarys + Fulmintis + Lunara or Helion + Glacy


This team eases the controls a little and uses the BREAK of Lunara or Helion and the healing of Glacy. Lunara and Helion are the two Aniimo you choose between at the start, so they fill the same slot.
Members

Who takes whom
- Prismana StellarysTakes on:Lita's Glynsera
- LunaraorHelionTakes on:Lita's Stellarys
- FulmintisTakes on:Lita's SherroLita's Glacy
- GlacyHealing, taking hits
Potential and held items
- ATK 20, BREAK 12
- HP · DEF around 12
- HP 20
- The rest is up to you
- Mainly staying power and healing
How to play
- Lunara (or Helion) handles Lita's Stellarys, but does not stay on the field trading basic attacks for long.
- Wear down Stellarys's BREAK gauge with Lunara's Lunar Eclipse (Helion: Holy Storm), then deal big damage. Both are skills that deal high BREAK damage based on the Aniimo's level. Lunar Eclipse is a magic skill used from range, while Holy Storm is a physical skill used up close that pulls opponents toward its center, so Helion has to get close to the opponent.
- When the skill cooldown is back, bring out Lunara (or Helion) to wear down the BREAK gauge, and switch to Glacy to take Stellarys's strong skills in its place.
- Prismana Stellarys handles Lita's Glynsera, and Fulmintis quickly takes care of Lita's Sherro and Glacy.
D. Prismana Stellarys + Prismana Glynsera + Lunara or Helion + Glacy
This team swaps Fulmintis in Team C for Prismana Glynsera.
Members
Who takes whom
- Prismana StellarysTakes on:Lita's Glynsera
- LunaraorHelionTakes on:Lita's Stellarys
- Prismana GlynseraTakes on:Lita's SherroLita's GlacyBREAK and the remaining opponents
- GlacyHealing, taking hits
- Without Fulmintis, check that you have the firepower to push through Lita's Sherro and Glacy quickly.
- If your Prismana Glynsera is undertrained, the risk of running out of time is higher than with Team C.
- For the builds of Prismana Stellarys, Lunara or Helion, and Glacy see Team C; for Prismana Glynsera see Team B.
E. Stellarys + Fulmintis + Prismana Infergon + Somniwing


This team clearly splits which opponent each damage dealer handles, and every time Lita switches you bring out the Aniimo assigned to that opponent right away.
Members
Who takes whom
- StellarysTakes on:Lita's Glynsera
- FulmintisTakes on:Lita's SherroLita's Glacy
- Prismana InfergonTakes on:Lita's Stellarys
- SomniwingEP recovery, Sleep
How to play
- Prismana Infergon handles Lita's Stellarys. Rather than chasing an opponent that moves far and uses clones, build up enough [Fire Debuff] first, then unload big attacks.
- Infergon's trait "Power of Fire" deals 30% extra damage to opponents with 5 or more stacks of [Fire Debuff].
- Somniwing supplies EP to the three damage dealers and handles Sleep.
- Fulmintis handles both Sherro and Glacy, so it must not go down too early.
F. Prismana Fulmintis + Scorchhowl + Minespine + Somniwing

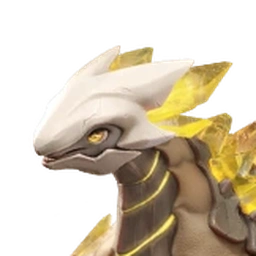
This team uses Minespine's Tunneling state to turn Lita's switching against her. You deliberately draw out the Aniimo Lita will bring next, so it plays quite differently from the other teams. Thanks to Minespine's trait "Earth Affinity", it can use skills even in the Tunneling state and deals 20% more BREAK damage.
Members
Who takes whom
- Prismana FulmintisTakes on:Lita's SherroLita's Glacy
- ScorchhowlTakes on:Lita's StellarysLita's GlynseraBig damage after the BREAK
- MinespineTakes on:Lita's StellarysLita's GlynseraHolds out in the Tunneling state while wearing down the BREAK gauge, and draws out Lita's switches
- SomniwingSleep, EP recovery, waiting on standby while resting
Potential and held items
- ATK 16, REGEN 16, BREAK 12
- A little HP · DEF
- Held Item: Heartseeker Pendant or Ferocious Fang (+15)
Held items
- BREAK 20, ATK 13, REGEN 12
- A little HP
- Held Item: Gargantuan Horn or Avenging Gear (+15). Both raise BREAK
- Gargantuan Horn: adds 0.7 BREAK every time the Aniimo levels up. At +15 it adds 10% BREAK, and the effect doubles if Acquired BREAK exceeds 15
- Avenging Gear: when hit, the BREAK of your next attack rises by 30%. At +15 that attack has a 50% chance to give 10 EP right away
Held items

How to play
- Early in the battle, put Lita's Sherro to sleep with Somniwing to create an opening, then deal big damage with Fulmintis.
- When Sherro goes back, bring out Minespine. While Minespine is in the Tunneling state, Lita has a hard time attacking properly, and you can use her switching order to draw out the opponent you want again.
- In one cleared run, against Minespine Lita brought out her attackers in the order Sherro → (once Sherro went down) Stellarys → Glynsera.
- Stellarys: keep wearing down its BREAK gauge with Minespine's Tunneling attacks. If HP runs low, switch to Somniwing for a moment to gain EP and time. Fill up EP just before the BREAK and deal big damage in the order BREAK → switch to Scorchhowl → fully charged Burn Breaker + Ultimate. (At max charge Burn Breaker uses up all remaining EP, and its damage rises by 30% for every 10 EP used.)
- Glynsera: wear down its BREAK gauge fairly safely with Minespine, then deal big damage with Scorchhowl or your best-trained damage dealer at the moment.
- Glacy: if it is left until the end, take care of it with Prismana Fulmintis. When it creates a healing zone, lure it out of the zone, then attack.
- The Potentials and Held Items are the build from one cleared run. They are not the one right answer you have to copy exactly.
G. Prismana Glynsera + Lunara or Helion + Prismana Stellarys + Somniwing
The team from a run that cleared without Fulmintis and with relatively little training.
Members
Who takes whom
- Prismana GlynseraEarly fights, finishing the remaining opponents (holding out and attacking as the situation calls for)
- LunaraorHelionTakes on:Lita's StellarysBig damage after the BREAK
- Prismana StellarysTakes on:Lita's Glynsera
- SomniwingSleep, EP recovery, taking hits
How to play
- You can clear the Lita rematch even without Fulmintis.
- Lunara (or Helion) does not keep fighting Stellarys head-on; it goes for its BREAK skill (Lunar Eclipse, Helion: Holy Storm) and the opening after a BREAK.
- Bring out Somniwing now and then to share Stellarys's attacks and refill EP.
- Prismana Stellarys takes care of Glynsera, and Prismana Glynsera handles both holding out and attacking depending on the opponent.
4How to beat Lita's Stellarys
Approach 1. Somniwing Sleep → one big hit
- ① Put Stellarys to sleep with Somniwing.
- ② After confirming it is asleep, switch to a damage dealer such as Scorchhowl or Infergon.
- ③ Land a charged attack or a big skill.
- ④ Switch back to Somniwing for Sleep and EP recovery.
- ⑤ Repeat.
Approach 2. BREAK with Lunara or Helion
- Rather than trading basic attacks, fight it mainly with Lunara's Lunar Eclipse (Helion: Holy Storm). Both deal high BREAK damage based on level. Holy Storm is used up close, though, so Helion has to get close to Stellarys.
- When Stellarys uses a skill, switch to Somniwing or Glacy to take the hit in its place, and when Lunara's (or Helion's) cooldown is back, bring it out again to wear down the BREAK gauge.
- Once it is in BREAK, unload your Ultimate and big attacks.
Lita's Stellarys is one of the most dangerous damage dealers. Cleared runs mainly use two approaches.
- Don't switch to a damage dealer before it falls asleep. Lita can see your Aniimo and switch to another Aniimo right away. If you apply Sleep first and then switch to a damage dealer, you can hold off Lita's switch for a while.
- [Sleep] from Somniwing's Hypnotic Spores keeps the opponent from moving for 5 seconds, but it wears off when the opponent takes damage. So hit a sleeping opponent with your strongest attack first.
5How to beat Lita's Glynsera
- The most common choice in cleared runs is Stellarys.
- Stellarys with Fission Needles has strong basic attacks (each basic attack has a 50% chance to deal double damage), so trading blows with Glynsera head-on to some extent is faster.
- Basic order: Shadow Magic (clone) → basic attacks through the final hit → Dodge (Shift on PC) to adjust distance → basic attacks again → Shadow Magic again → basic attacks
- Using Shadow Magic again swaps the positions of the main body and the clone. When Glynsera throws Boomerang Blade (an ice blade thrown forward that spins), dodge it this way and you can keep your attacks going.
- Just before your EP is full, use attack skills to wear down its BREAK gauge a bit more. Once it is in BREAK, set up a clone again and keep the basic attacks going to the end.
- Don't keep running away and hitting once or twice at a time; dodge only the big attacks and trade blows the rest of the time to cut down the time.
- Grizbo can also be used as a different damage dealer, but it may take longer than Stellarys.
6How to beat Lita's Sherro
- In cleared runs it is most often handled with Fulmintis.
- Use Fulmintis's blade-enhancing skill first (Enhanced Lightning Blade or Enhanced Light Blade: skill Crit Rate +35% for 20 seconds), then unload attack skills and your Ultimate quickly.
- Dodge sideways to avoid the forward slash Sherro lunges with.
- For wide-area attacks or its Ultimate, it is safer to get behind it or to switch to another Aniimo for a moment to take the hit.
- If your team has Somniwing, put Sherro to sleep too and then attack with Fulmintis. Lita switches less and you get more time to attack. Many cleared runs take Sherro down early this way.
7How to beat Lita's Glacy
This is the most important part of the Lita battle. If you keep running out of time, this is very likely what you are missing.
- Glacy's Ultimate Spring of Life creates a round water zone fixed in place and heals allies inside it by a large amount over 6 seconds (36% of Glacy's Max HP).
- If Lita's Aniimo are inside this zone, the HP you have taken off quickly fills back up. Don't start attacking as soon as Glacy comes out; get the opponents out of the healing zone first.
- In cleared runs, Lita's Glacy often used its Ultimate as soon as it came out, and a golden glow appeared around its body at that moment. When it comes out, check for the golden glow first.
- If it has not used its Ultimate, you can attack right away with the assigned damage dealer such as Fulmintis, but it can use it even while you are attacking, so keep watching for the effect.
- Apart from its Ultimate, it also uses the regular skill Healing Water. When "Healing Water" appears at the top of the screen, the HP of Lita's whole party fills up right away by 8% of Glacy's Max HP, and another 10% over 5 seconds. This goes to the whole party rather than a zone, so luring opponents out cannot stop it; the only way is to wear them down faster than the healing with the assigned damage dealer.
- 1
Glacy comes out
- Check for the golden glow or a healing zone
- 2
Move far away
- Move to the back or to a far spot
- 3
Make them follow
- Get Lita's Aniimo to follow you
- 4
Out of the zone
- Lure them all the way out of the healing zone
- 5
Attack with the assigned damage dealer
- Outside the zone, switch to the assigned damage dealer and attack
8Why Somniwing is strong against Lita
- Looking at cleared runs, a great many teams use Somniwing. Somniwing is not just a healer; it does three things at once.
- EP recovery: "Butterfly Dance" recovers 45 EP, and "Ethereal Light Wave" raises the EP recovery rate of party members along its path by 30% for 20 seconds.
- Slowing Lita's switches with Sleep: put the opponent to sleep with Hypnotic Spores, then switch to the assigned damage dealer.
- A relief role that takes dangerous attacks for a moment
- In particular, Somniwing Sleep → switch to the assigned damage dealer → one big hit is very strong against Stellarys and Sherro.
9Turning Lita's switching against her
- Lita strongly tends to bring out opponents that have the edge over your Aniimo. At first it feels like the matchups keep getting tangled because of this, but if you turn it around you can draw the opponent you want onto the field.
- A typical example is the Minespine team (Team F). Bring out Minespine and go into the Tunneling state, and you can use the pattern of Lita bringing out her attackers in order to take them down one at a time.
- In the Tunneling state it is immune to ranged attacks, so even when Lita's ranged attacks hit, only "Immune" appears. However, skills that strike the ground launch it into the air, and its HP keeps dropping little by little while it is underground.
- Somniwing's Sleep works on the same principle. Apply Sleep before Lita switches, then bring out the assigned damage dealer, and you can block her switch for a while and deal big damage.
- In other words, the Lita battle goes one step beyond "when the opponent switches, I switch too": it is a battle where you deliberately bring out a specific Aniimo to draw out Lita's next switch.
10Common mistakes in Potential builds
- If you have lost to Lita several times, check the Potentials of the Aniimo you use again. Often there are unspent Capability Awakening points left, or the usual build is brought along unchanged.
- The Lita battle is about handling set opponents, so the roles are clear.
- Attackers: raise ATK first.
- Damage dealers that also have to handle BREAK on their own: invest in BREAK as well as ATK. Fulmintis and Prismana Glynsera are typical examples.
- Stellarys: it has to trade blows with Glynsera, so don't raise only ATK; secure at least some HP and DEF.
- Somniwing: focus on REGEN and staying power rather than ATK.
- Glacy: its purpose is healing and taking hits, so invest mainly in HP.
- Land on multiples of 4: every time the Potential total reaches a multiple of 4 you get +4%. If the total stops at 11 or 15, you miss +4% by 1 point.
- If you have not used a Capafruit yet (+1 to each of the 6 Innate Potentials, usable only once per Aniimo), using it on a key damage dealer whose slightly low ATK makes you run out of time is one option.
11Held Item essentials
- Stellarys – Fission Needles: each basic attack has a 50% chance to deal double damage (+10: recovers 1 EP when it triggers; +15: when EP is full, basic attack Damage Amp +30% for 10 seconds). It suits the play of setting up a clone and landing basic attacks continuously, so it matters most for the Stellarys that handles Glynsera.
- Fulmintis – Heartseeker Pendant: deals extra damage on a critical hit. It also pairs well with Fulmintis's trait "Electro Stash" (recovers 4 EP on a skill critical hit), so it is good for cleaning up Sherro and Glacy quickly.
- Scorchhowl – Ferocious Fang: raises Damage Amp and ATK. It suits the role of dealing big damage in a short time after Sleep or a BREAK.
- Somniwing – Spirited Feather: raises REGEN (+15: Cooldown reduction 10%). It refills the damage dealers' EP and brings their next attack turn sooner.
- Minespine – Gargantuan Horn or Avenging Gear: in the Minespine team, the key is to wear down the opponent's BREAK gauge quickly rather than taking off HP directly. Both are Held Items that raise BREAK.
Held Items recommended in this post
12If you keep losing, check these first
I run out of time
- Are you only fighting while running away?
- Are your assigned damage dealer's ATK or BREAK Potentials too low?
- Do you keep fighting inside Glacy's healing zone?
- Are you failing to finish off Stellarys or Sherro in one go and letting her keep switching?
Stellarys keeps taking me down
- Make use of Somniwing's Sleep.
- With Lunara or Helion, don't trade blows; just wait for the timing of the BREAK skill (Lunar Eclipse, Holy Storm).
- Take its strong attacks with Somniwing or Glacy instead.
Glynsera takes too long to beat
- Check that your Stellarys has Fission Needles.
- After setting up a clone, are you landing basic attacks properly through the final hit?
- Don't try to dodge every attack; dodge only big attacks such as "Boomerang Blade".
Glacy keeps filling their HP back up
- Check whether the golden glow is showing.
- Lure the opponent out of the healing zone, then fight.
Lita keeps switching so I can't land attacks
- Apply Sleep first, then switch to a damage dealer.
- Use the Aniimo you have out now to draw out Lita's next switch.
- Focus on taking down one Aniimo, then move on to the next opponent.
13Playing on mobile
- On mobile you have to switch quickly, dodge and watch the opponent's effects all at once, so it can feel harder than on PC. The gap is especially large in parts that need split-second controls, like dodging with Stellarys's clone or luring Glacy out.
- If you run out of time on mobile, besides raising your stats further, first try a team that eases the controls, such as one with Somniwing's Sleep.
14Clear rewards
- Winning the rematch for the first time gives a Glory Badge along with Safaris ×400, 1 Phenomena Crystal, 1 Irisalis Petal, 2 Report Cards and 2 Fragment - Besauce.
- After you win, the quest "Assessment: Starlight's Glory" opens. Talk to Lita at Boomblast Arena to receive Sherro - Prismana as the reward.
- If you want to be sure of getting Prismana Sherro, this is a battle you have to get through.
First-clear rewards
 Safaris×400
 Phenomena Crystal×1
 Irisalis Petal×1
 Fragment - Besauce×2
"Assessment: Starlight's Glory" quest reward
FAQ
- Q. When can I do the Lita rematch (Lv. 65 Lita)?
- Beat Lita at Boomblast Arena once in the quest "Assessment: Starlight's Witness" and finish the quest, and the "Elite Pathfinder Rematch" opens. Lita's Aniimo are all Lv. 65 in Prismana Form.
- Q. Is there a time limit?
- Yes. You have to take down all 4 of Lita's Aniimo within 5 minutes. If you fight inside Glacy's healing zone or only run away, you can easily run out of time.
- Q. How do I get Prismana Sherro?
- Winning the rematch opens the quest "Assessment: Starlight's Glory". Talk to Lita at Boomblast Arena to receive Sherro - Prismana.
Pro tips
- •When you pick one of the recommended teams, a mark like #combo-a is added to the end of the address. Send that address as it is and the picked team shows up already open.
- •When Lita's Glacy comes out, check for the golden glow before pressing the attack button.
- •Switch to a damage dealer only after confirming Somniwing's Sleep has landed.